Monday, June 23, 2014

The "Glamorous Barn" Powder Room

When we moved in, there was a little closet that had been the laundry room. Because we did the mudroom/laundry room project, we had this little room that housed the furnace and hot water heater. Because the current kitchen has no storage we used that little room as kitchen storage. It was either going to be the pantry for the new kitchen or it was going to be a powder room. We decided on powder room because bathrooms always add more value to a home. 

This is the current family room that is the future kitchen. Door on the left is mudroom/laundry, door on the right is new powder room. The man working is Neal, of course, because working is what he does. And the mess is from us, because we actually live in our house while projects go on, which makes life messy, fun, dusty and interesting.

Low lights of the space before it's beautification: the carmel-colored paint that won't leave me alone (I think this literally is the last spot in the house with this color). The nondescript ceiling light. The linoleum floors. 


And it begins! The window became smaller so Neal could make a closet with bifold doors for the water heater/furnace.

Here you can see the dark charcoal tile floor (same as the laundry room for some cohesion). On the walls is plywood for some board and batten. Look how golden that lighting is from that old light. Yuck.

Here's where the project gets real. I took a design risk with BLACK paint. Oh yes. As you can see by the picture my very practical, khaki-loving husband, was NOT so sure about it. Honestly, I wasn't either, but it started to grow on me, when I picked up…..

This beautiful, amazing, perfectly-sized, I-love-it-so-much light off of Craigslist. I hear angels sing every time I look at it. 


The glamorous barn started to come together. We couldn't find a vanity we liked for a price we loved, so Neal built one. I showed him like two pictures, and BAM! I had a vanity. He's like a fairy-guy-mother.

So then inspiration strikes, and I hear this little powder room begging for pale pink (maybe it was the angels telling me) and a little bit more gold. 


This print is from one of my favorite artists, Lindsay, from Lindsay Letters. And she's having a sale in July so get on it. It says "Be strong and courageous, seek adventure and truth." Good words to ponder while going potty.


This was a little postcard from Hammerpress studio in Kansas City. I really love letterpress. Both of the gold frames game from the thrift store. I really hate buying retail-priced frames. They always seem so expensive for what you're getting. There's more excitement and potential for funky junk with thrift store frames. I didn't spray these, but a can of spray paint can transform anything, so usually I just hunt for shapes, not color.


This was a greeting card I put in a frame, but the company doesn't do cards anymore. 


I threw up a "curtain" just to add some more color, but it needs help, so at some point I'll help it.


Two wire baskets add all the storage it needs. 


And there you go, a "glamorous barn" powder room is born.

Tuesday, May 6, 2014

Fireplace, again.

The white brick, though I didn't mind it this whole time, looked really out of place once Neal had built all the built-ins. 

But not anymore. 


We like how it turned out, and feel like it updates and modernizes the look and feel of the room. 


Before: 

During:
and now: yay.


Sunday, April 27, 2014

Phase One

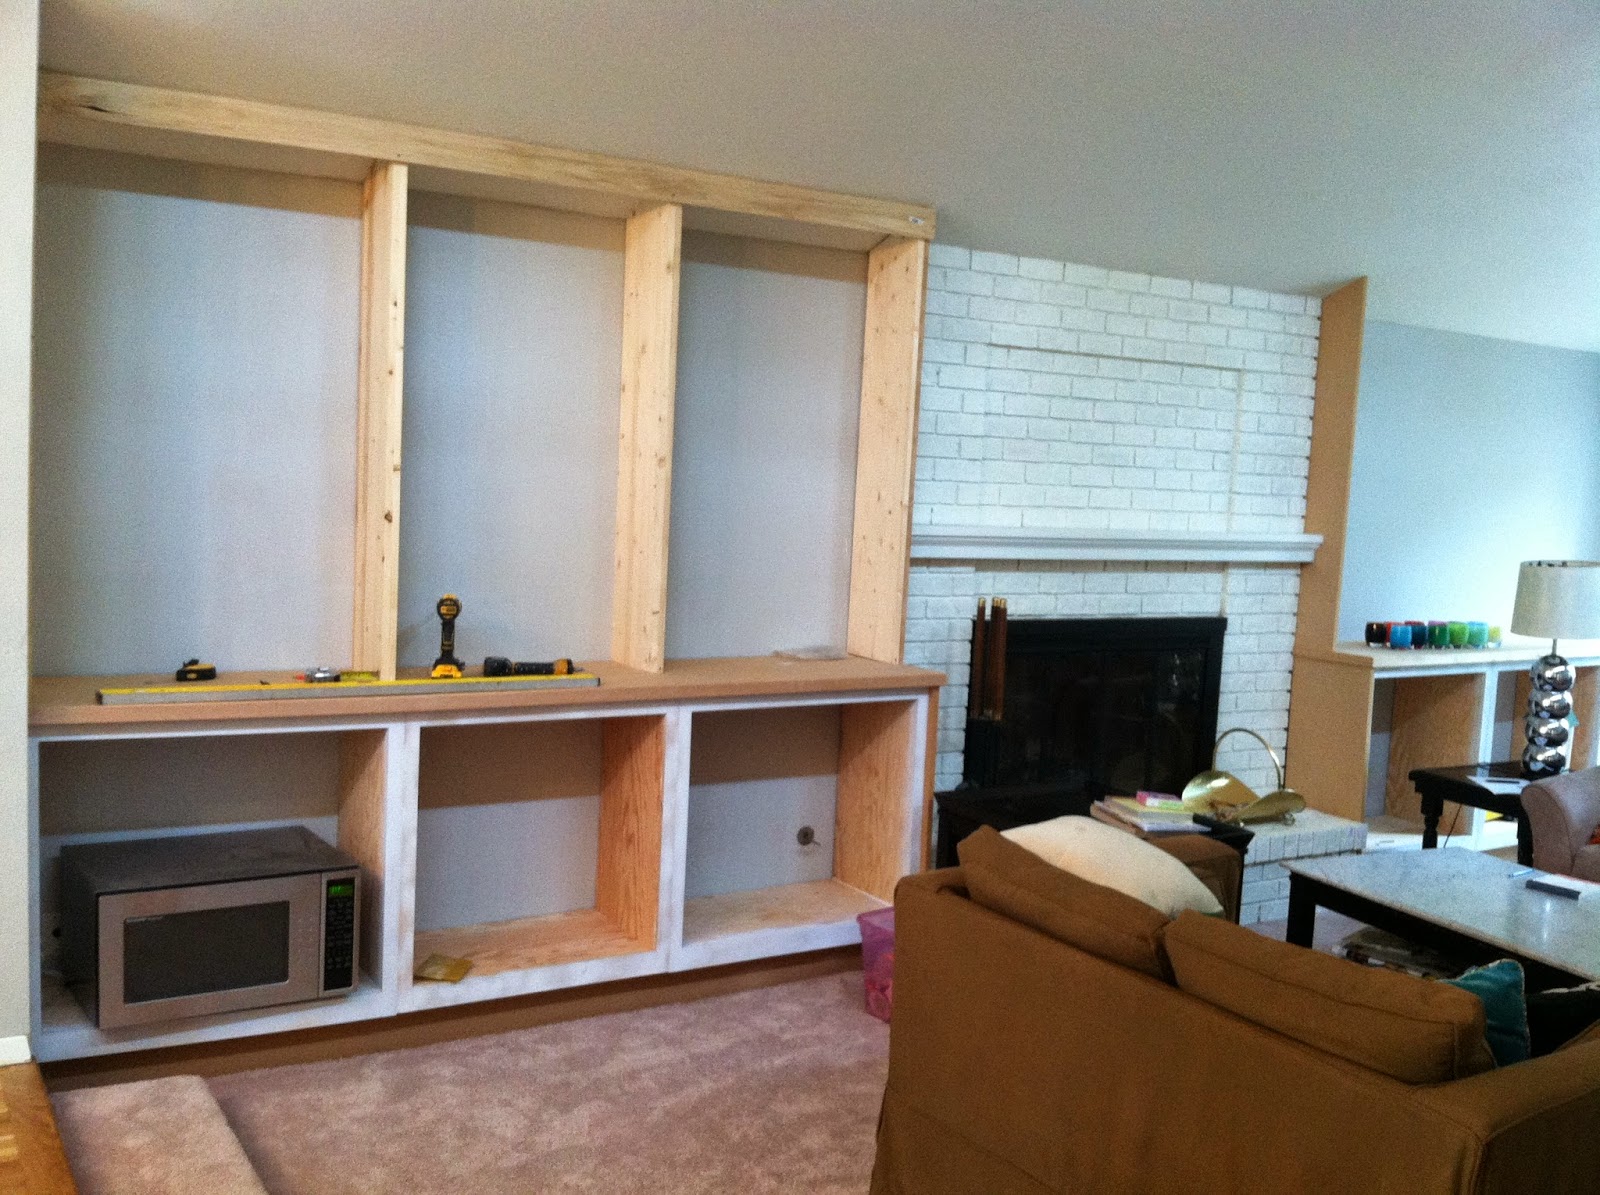
You wouldn't naturally think that the beginning of a kitchen remodel begins in the living room, but ours does.  We can't do floors until the current kitchen and surrounding walls are taken down. One of the walls slated to be removed is one of the walls of the current kitchen, with four pantry cabinets, ovens, fridge, etc. This house isn't huge, and we knew we'd need a place for all the kitchen stuff in between the current kitchen and the new kitchen, so it looked like the perfect time to build built-in cabinets and shelves surrounding the fireplace. Because WHY NOT?!

Let's review what we were working with: 

Here is the living room the day we moved in. Not terrible, but lots of potential.

Here's the same space with some paint, a mantle and some many glassybabys (I'm addicted).

So we began…shelves and cabinets flanking the sides of the fireplace. Easy right? Not when the cabinets are 18" and no one makes an 18" base cabinet. Never mind then, super-Neal to the rescue.


 That was easy.


He moves so quickly that he's blurry in pictures.

In process:


Panel over the top of the brick for the TV eventually.


Strong enough for this guy to sit in them.

Now they just need to be painted:


We had to set up a plastic paint zone so the paint wouldn't get all over everything else in the room. Neal painted away while I held the plastic away from him so he could move around. The plastic was not transparent so I had to wait patiently until he was finished to see what they looked like. 


Looks better than raw wood, but I wanted more dimension to the shelves. Of course, I went with my go-to Sherwin Williams paint strip, and his is Gauntlet Grey.


I couldn't wait until the cabinet doors were installed to reveal the unit. Also, the remaining white brick will be covered up with some stone, which I'll show when it's actually finished. I'm dying to put all of my foofey things to display in the shelves, but for now, they'll be holding cereal, pots and pans, a rice cooker and snacks. That's ok for now because better things are coming!

Because I love before and afters:


And as I've been typing Neal is making the cabinet doors. More later on that!


Sunday, March 23, 2014

Loose Ends

We've had our eyes set on a new kitchen. We've been refining our plans for a few months, and I think we're going to start on Kitchen Phase One pretty soon. In the meantime, we thought it would be a good idea to tie up some loose ends. One being the siding. We've been fooling everyone because we only did the front. There was still ugly siding in back. No one ever saw it, so Neal decided to do it in between jobs. 

Let's review what the siding look liked: 


And here's what it looks like after with new paint, trim and trim paint:


If you're detail oriented, you'll notice there's a new window on the left in the picture above. It's in the dining room. There were no windows on one side of the house, so you couldn't see into the back yard in any part of the house


Now you can:


TA-DA.

So that's awesome. It brings in more light which is nice since the sun travels on that side of the house. We also decided to spruce up the back deck. It was painted kind of red. We decided not to spend the money yet to completely re-do it, but with some Sherwin Williams "Deck Scape" paint and galvanized hog fencing (yep, we're hogs) a face lift doesn't make it stand out as much. Here's a sort of before picture. There were red painted diagonal slats blocking the whole deck from looking out.

It's not finished yet, but here it is in progress:


So we also did the front handrails. We got a bid for that stainless steel cable system for a open, but a little-bit-modern look, for $1200. That wasn't happening, so the hog stuff is in front now too. Personally, I like it better than the stainless cable, and it was 1/10th of the price of the cable, so I like it even more. And, as I was doing this blog post Neal and I decided to paint the handrails white, so now they're white (well almost): 
Before the white paint. 

Ok, then the last thing is that I really wanted to "finish" our master bedroom. I still haven't, but I've added some details, made new curtains, etc. 

Antler curtain tie backs from Urban Outfitters:

I change the furniture around about every other week, and I've landed on this arrangement (I think, for now?!)

 A real antique! Given to me by some friends. It feels disrespectful to paint it, so I'll probably keep it like this:

I don't know which lampshade I like better:

So, there you go. Some more updates, tying up loose ends before we start in on the kitchen.